Every Wise Woman

Real Food, Real Health, Real Birth

Filtering by Tag: Recipes

Radically Natural Recipe: Winter Spice Oatmeal Breakfast Cookies (plus Soaked Steel Cut Oats)


We usually end up with leftover cooked oats on the mornings we eat breakfast porridge.  This recipe (borrowed and tweaked from lifebyjeanie.com) combines leftover cooked oats with gluten free flours and warm wintery spices.  We eat them for breakfast, smeared in butter, but you can eat them as cookies anytime.  They are soft and filling.  Enjoy!

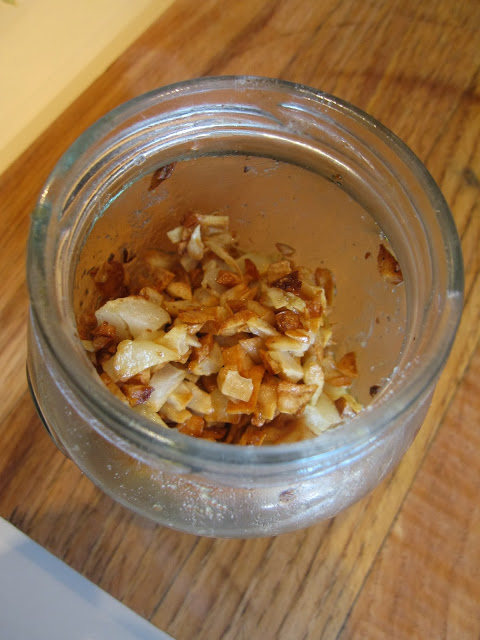
[Fun fact...when made with sunflower butter, your cookies will turn green.  This has happened to me, and I just learned that the odd hue is caused by the sunflowers' chlorophyll reacting with the baking soda.  Check this out.]


Winter Spice Breakfast Cookies

1 cup coconut oil OR 1/2 cup coconut oil and 1/2 cut butter OR 1 cup nut butter
3/4 cup raw coconut sugar OR 1/2 cup raw honey
2 eggs
3 tsp vanilla
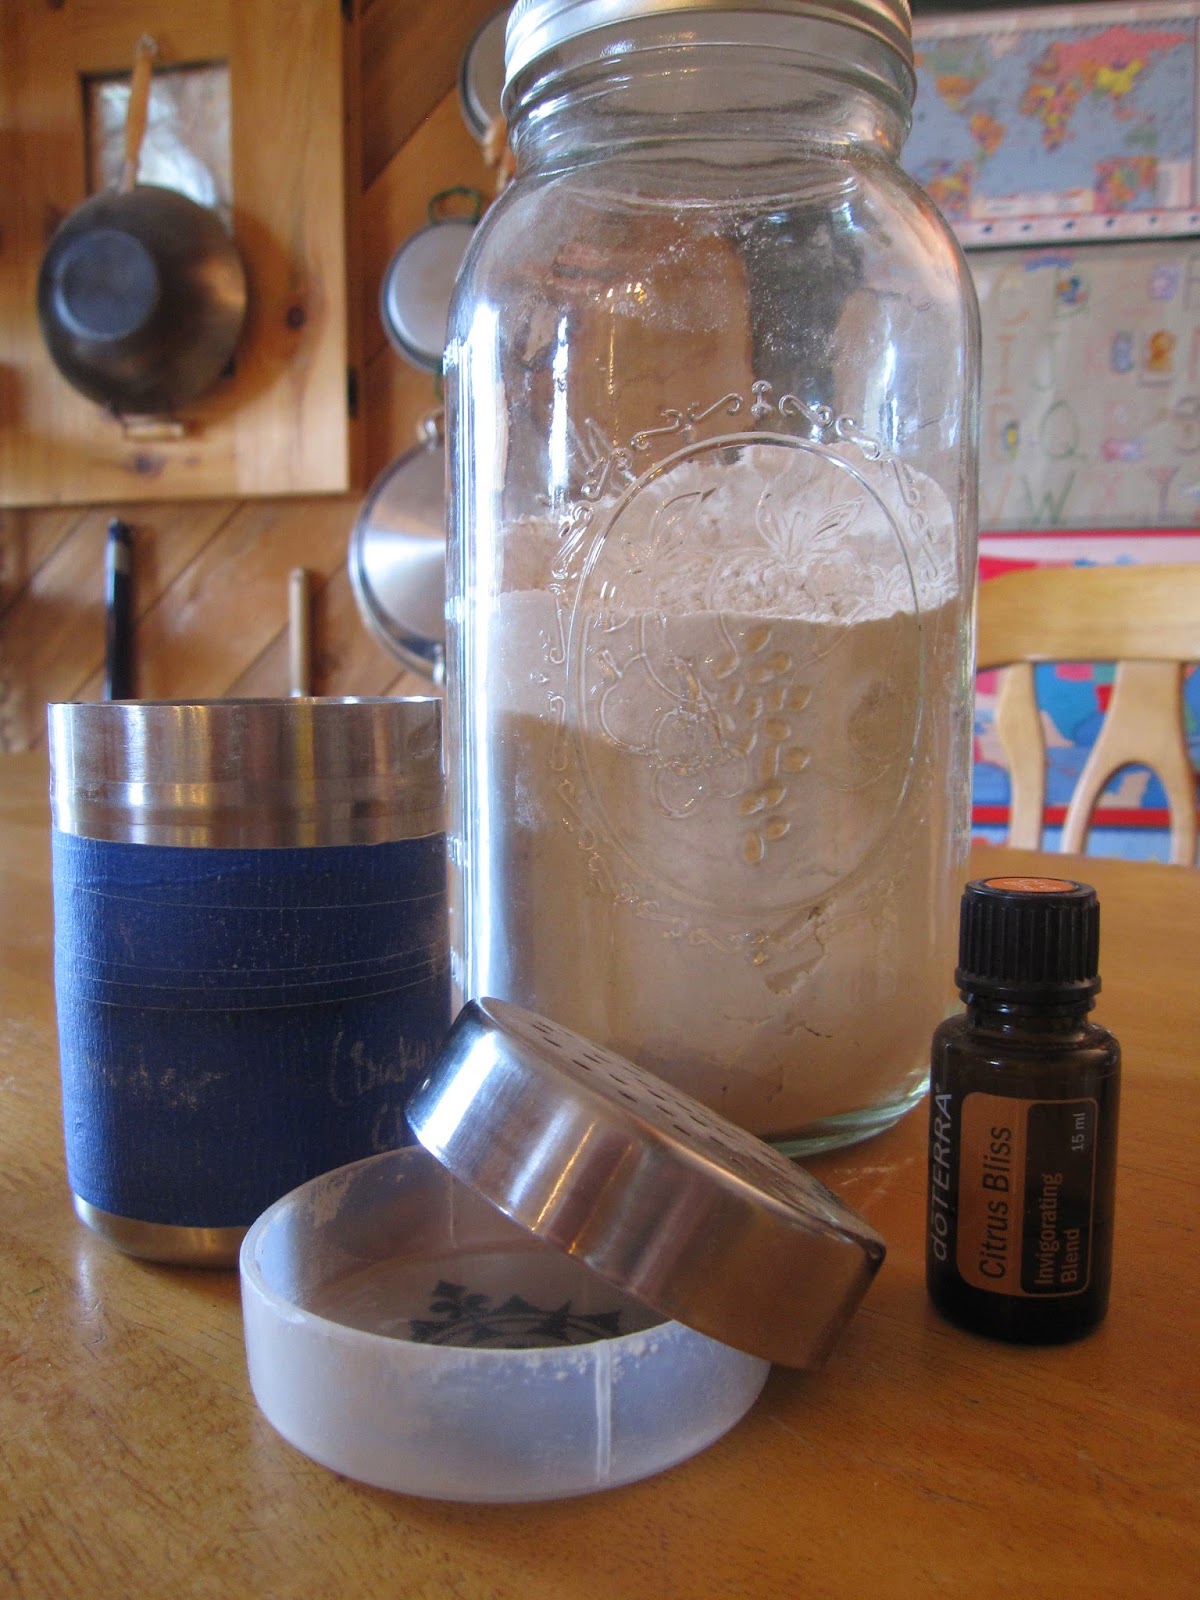
2 cups gluten free flour mix (check out the video below)
1 tsp baking soda
1 tsp sea salt
1 Tb cinnamon
1/2 tsp. each ginger, nutmeg, cloves (more to taste as desired)
1 cup raisins
1/2 cup raw cacao nibs
2 cups cooked soaked oatmeal (recipe below)
4 Tb raw milk OR yogurt

Combine the wet ingredients (not the oats or milk yet) and mix well.  Incorporate the dry ingredients (minus raisins and nibs), then add the milk and the cooked oatmeal.  Finally add the raisins and the cacao nibs.  Mix until well combined.  Spoon onto greased or lined (silpat, parchment) cookie sheets.  Bake at 375º for 12 to 15 minutes.  The cookies will not spread and they will be golden and soft when finished (though thoroughly cooked inside...should not be gummy).

Here is a helpful video tutorial on making your own gluten free flour mix (thanks for the link, Amy!).


Soaked Steel Cut Oats (with cooking shortcut)

I have seen varying NT-style methods for preparing oats.  Here is my method.  If you don't already know why you should soak your oats and other grains (in an acidic medium) before consumption, please read Nourishing Traditions and/or the many available articles on the topic (I'll post a few links below).

Because oats are nearly devoid of phytase, the enzyme activated by soaking that helps to break down phytic acid, it is important to add a small amount of a grain that does contain phytase during your oat soak.  I use buckwheat because it is a gluten-free grain (as are oats when not contaminated).  The ratio is 1 Tb. buckwheat groats to 1 cup oats.  I usually cook steel cut oats for improved nutrient and taste profile.

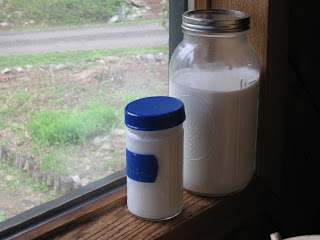
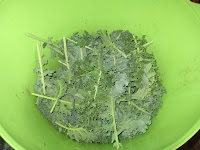
My current method of "quicker" steel cut oats for breakfast is as follows.  On any given morning, I begin the soaking process by putting my oats and buckwheat into my pot with a small amount (about 1/4 cup) of kefir or a few generous dashes of ACV.  I then fill the pot with nontoxic water, basically in a 2-1 water to grain ratio.  (The oats will expand.)  I allow the oats to soak all day (minimum 12 hours).  Before bed, I rinse the oats with fresh water (some people do, some people don't...), then return them to the pot and cover the oats with water to about one inch above the oats' level.  I turn on the stovetop to medium and bring the oats to a gentle boil.  At that point, I turn off the heat, cover the pot with its lid, and go to bed.  In the morning, the oats will be cooked, having slowly absorbed the liquid overnight, and will only need to be heated before consumption.  I serve with generous amounts of butter, cinnamon, some raisins and raw milk.  Leftover oats are baked into breakfast cookies.

[Some suggest that oats should be soaked for 24 hours.  This is not bad advice.  The longer the soak, the more nutrients become available.  To soak for 24 hours with my method, just start the soaking on Evening A, and rinse and "cook" on Evening B.]


The "Why" of Soaking Grains


Radically Natural Recipe: Potato Chips


Don't eat junk?  Check.  Don't buy processed food?  Double check.  Curious to try a fun, healthy, salty starch snacks post GAPS?  Sure!  Let's make potato chips!

The primary health snafu with commercial potato chips (even those sold at "health" food stores) is the frying fat used.  We know that fake fats and "veggie" oils just aren't good for us.  But they certainly are cheap for commercial production.  If you want to fry foods and avoid deleterious health affects, make your own using real stable fats...saturated fats.  The best choices for potato chips are lard or coconut oil.

It's time-consuming to make your own snacks, but the value of Real Food is undeniable.  And it's fun to get your kids involved...they are learning and they love the eating!  Be particularly attentive, though, when frying with children, as we want to avoid splatter burns.


Tips for Making Potato Chips

Choose the correct potato and slice it thinly.  A floury variety is best for chips, as they have a lower water and sugar content, allowing them to crisp more easily.  Basically, you want a Russett variety.

Use a wok or heavy-bottomed pot for the frying, and have a candy thermometer that can go to 350º F.

Perform a water rinse and vinegar soak on your potato slices, then dry them.  This removes starch and increases crispness in your chips, as well as reducing frying time.


Potato Chips:  The Steps


1.  Slice potatoes thinly, about 1/8" (either a mandoline or food processor work nicely)
2.  Rinse the slices in cold water, filling bowl with water and swishing about the potato slices, then draining water.  Do this multiple times until the water remains clear.  This is helping to remove excess starch for the frying process.
3.  Soak the slices in a vinegar water bath (1/2 cup vinegar to 4 cups water) for up to 2 hours.  This helps to increase crispness during the frying process.
4.  Allow the slices to air dry.  This reduces water content and shortens frying time, encouraging crispness.
5.  Heat about 4 cups of a healthy saturated oil (coconut or lard) in a wok or large, heavy-bottomed pot until it reaches 300º.  Monitor temperature with a candy thermometer.  The temperature will fluctuate as you add and remove the potatoes, so adjust the heat accordingly.  You don't want the oil so hot that the chips easily burn...I find that temps between 300º and 350º work well.
6.  Using a slotted spoon or Chinese bamboo strainer or other such device, add a group of slices into the pan so that all slices will submerge into the oil.  They will pop upon entry as water leaves the potatoes.
7.  Fry until the chips are done...they will be golden brown and the sizzling/popping noise will cease, indicating the absence of water in the chips.  About 5-6 minutes a batch.
8.  Remove slices (using strainer) to a paper towel-covered plate and season to your desired taste...lots of real salt, surely, and perhaps pepper or a homemade herb or spice blend.
9.  Allow to cool and dry completely before storing in a bag or container to ensure continued crispness.
10.  Save some for the kids!

What? No Bread with That Butter?

People who know me well know me as a butter pusher.  Fat (wonderful fat, nourishing fat, necessary fat, delicious fat, good fat) is the most essential human nutrient, and my favorite fat is pastured butter...homemade from raw grass-fed milk preferably, but hey, that's hard to keep up with 365 days a year...I buy butter, too!  Good butter is so beloved in my household that my younger son likes to give pounds of butter away to special people as gifts...you know he really thinks highly of you when he wants to send you home with some butter.

As my husband and I share with people how important good butter is in the diet and how essential it is to eat lots of it daily, we inevitably hear this question:  How do you eat butter when you don't eat bread?  Granted, we are beginning to eat some homemade sourdough breads of late, but it isn't a regular occurrence; and we were grain-free for two years on the GAPS healing regimen.  So the question remains...how do you eat lots of butter when you don't eat lots of grain-based foods?

I thought I'd enlist my kids to help spread the butter love and share how we eat our butter, hopefully inspiring others to eat more butter without thinking it has to be on bread.  The response I got was funny...my oldest son looked at me, head cocked, eyebrows raised and asked, "What do you mean, people don't know how to eat butter?  You just put it on everything."  I love it!  He is properly butter indoctrinated.


Basically, we just put butter on all our food.  Whatever the meal is that I've prepared, we just top it with butter.  Eggs for breakfast?  Butter them...and the pastured bacon that goes with them.  Steak?  Finish it with a pat of butter.  The accompanying roasted root veggies get buttered, too.  Salmon with carmelized onions and asparagus?  Butter, please!  Roast duck with butternut squash and pureed cauliflower?  How could you not drench with butter?!  We even put butter in our soups...it melts, and it's delicious.

We all know it's important to eat healthy vegetables with our main meals, so if you aren't doing a raw salad, try veggie sautes.  It's a regular standby here, and so easy, nutritious and delicious...just saute onions, garlic, carrots, fennel, summer or winter squash, kale or chard, whatever you have on hand!  When you plate the meal, just add butter!  Steamed veggies?  Of course they love butter.  Oh, how scrumptious veggies are with butter!  If you are eating any form of cooked vegetables, you have a butter vehicle just waiting to be adorned.


I make a lot of one-pot meals with meats (lamb, pork, beef) and veggies...I like fewer pots to clean.  So whether it's Shepherd's Pie or No-Noodle Lasagna or just plain old beef and veggie stir fry, top it off with a spoonful of butter!  Many cultures drizzle all their dishes with olive oil.  We do that, too.  And we also dollop with butter...same concept.

Baked winter squash, baked sweet potatoes, baked all-other-kind-of potatoes, absolutely beg for butter.  And pureed cauliflower spiked with lots of butter (aka GAPS mashed potatoes) is a surefire crowd pleaser.

My kids butter their cheese sometimes.  And when I bake cookies (gluten free at this point), we butter those, too.  My husband likes to eat pick-me-up spoonfuls of butter drizzled with raw honey.  The kids love "chocolate treats," basically butter/cacao mousse.

If you eat grains, all the better to add more butter...rice, quinoa, millet, morning oats...whether plain or pilaf, accompanying grains are always better topped with butter.  Tortillas?  Top with butter, cheese, avocado, salsa, what have you.  Crackers?  Butter them.  Organic popcorn?  Come on, that's an easy one!

So, how do we eat our butter?  Well, I think the better question is how do we not?  (We have yet to dip cold raw veggies in plain butter...though celery sticks with butter and raisins are good.)  The key in my mind is that we are creating meals with Real Food from scratch...and good food begs to be accompanied by good butter.  And olive oil, too...I certainly don't mean to discriminate.  My passion for butter doesn't blind me to the other good fats, we use them all...coconut, lard, duck fat...they all have their place in the kitchen, some for prep, some for finishing.  

But around here, butter reigns supreme.  So grab some grass-fed butter and drip, dollop, scoop, smother...you'll wonder how your meals ever made it to your stomach without butter.


Recipe: GAPS Mashed Potatoes...Pureed Cauliflower

(Super easy, super delicious.  After 6 months on the GAPS protocol, you can barely tell the difference in flavor between this and mashed potatoes...well, we couldn't.  And we took this recipe with us after GAPS, along with many others, because it is just so delicious and nutritious!  It's not really a "GAPS" recipe as much as it's just another way to eat great food.) 

Steam a head or two (depending on size) of cauliflower in water.  When fork tender, put the cauliflower and 1/2 cup of the cooking water into your blender.  Add 1/2 cup butter and some real salt to taste.  Blend until smooth.  You can adjust the amount of liquid to suit the consistency to your taste.

For post-GAPS folks, blend the cauliflower with raw grass-fed milk rather than the cooking liquid, and don't forget lots of butter!...this version is even creamier.  Yum!

Radically Natural Recipe: Vanilla Ice Cream

The intense summer heat, combined with no air conditioning, means one thing around here:  Ice cream for dinner!  Vanilla ice cream requires no use of heat, so it is our crowd's current favorite.  An all-cream (or mostly all cream) version helps keep kids full until morning.  The extra spices enhance the vanilla flavor.  Sometimes we make an eggnog version, sometimes a Mexican vanilla.  Here's our latest iteration.  It is quite rich, so start with small servings.


Real Vanilla Bean Ice Cream

4 cups raw grass-fed cream
1 cup raw grass-fed whole milk
1/4 to 1/2 cup honey (to your taste, we prefer less sweetness)
4 egg yolks
2 tsp. organic ground vanilla beans (purchase pure vanilla powder from Mtn Rose Herbs or Amazon)
Generous sprinkles of cinnamon and nutmeg

Gently whisk all ingredients (you don't want to blend or beat, this adds air/foam), then chill mixture for a few hours.  Pour chilled mixture into your running ice cream maker, follow instructions for your unit, and Enjoy!

Radically Natural Recipe: Gelatin Jigglers

Who needs more gelatin in their diet?  We all do!  Gelatin builds collagen in our bodies, and collagen builds our tissues...bone, flesh, cartilage, etc.  Our gut lining needs collagen, our fascia and skin and joints need collagen, our brains need collagen.  We need to be consuming more gelatin, and soups made from homemade broths are not the only way to do it.  

Gelatin makes a wonderfully refreshing, jiggly summer treat (sure, we eat them all year long).  Who needs sugar-ladened, artificially flavored and colored jello?!  Instead, grab some good quality gelatin and make some Real Food jigglers!


Coconut Vanilla Bean Jigglers

2 cans coconut milk
2 Tb. gelatin
1/2 tsp cinnamon
1 tsp. vanilla bean powder
~1/4 cup honey (or less...honey to taste)
optional cut fresh fruit

In a saucepan on low heat, warm the coconut milk and add all the ingredients (except the fruit), whisking vigorously.  Don't let the mixture simmer strongly (if at all), you just want it warm enough for the gelatin to dissolve...this preserves the nutrients of your ingredients.  If you use Jensen's gelatin, this should work without producing clumps.  Great Lakes gelatin works better if you dissolve it in liquid first before adding it to the entire batch for mixing.

Once all ingredients are dissolved and well combined, pour the mixture into a pyrex dish and refrigerate until the gelatin sets (about an hour).  Add your fruit before putting the jiggler mix in the fridge to set.


Hot Cacao Jigglers

(aka "Mama Medicine" Jigglers because of the addition of maca, a wonderfully adaptogenic botanical that helps our adrenal system)

2 cups raw grass-fed milk
2 Tb. raw honey (or honey to taste)
1 1/2 Tb. raw cacao powder
1 tsp. cinnamon
1/4 tsp. vanilla bean powder
1 Tb. maca powder
1 1/2 Tb. gelatin 

Same directions as above.

The key to jiggler success is remembering that 1 Tb. of gelatin gels a pint of liquid.  Results may vary depending upon your ingredients and the ambient temperature in your home.  Experiment with your own flavor combinations and have your kids help.  It's fun and easy to make jigglers, which is nice considering how quickly they get devoured!!  

Radically Natural Recipe: Mexican Chocolate Ice Cream

What do you do when summer arrives early, you live in an attic with no A/C, and you have goat milk coming out your ears because all four of your does ended up kidding at the same time?

You make ice cream!


Of course, it helps when you have a friend with a Guernsey cow that provides luscious, luxuriously thick cream.  Raw grass-fed cow's cream in combination with raw browse-fed naturally homogenized creamy goat milk makes deliciously decadent ice cream.

I purchased a Cuisinart 2 quart ice cream maker last month so we could put all our goat milk to work.  I really prefer the density of gelato to the air-whipped lightness of ice cream.  I also desire that my ice cream remain raw and contain multiple pastured egg yolks, so I can use it as a nourishing health food.  I'm working on creating a gelato consistency using the Cuisinart, and I'm getting close to a consistency I like.  But to achieve said consistency, a cooked custard must be created for the gelato base.  So I'm experimenting with various times and temperatures for the custard phase to balance my dual desires of consistency and rawness.

I've experimented with a completely raw vanilla bean ice cream, raw egg nog ice cream, and chocolate gelato-like ice cream.  Since I rarely measure when I create in the kitchen, the batches vary in flavor consistency.  But no one has complained yet!  I did promise a dear friend, however, that I would develop and share our current favorite, a dark chocolate, cinnamon-spiced gelato-like ice cream.  So I made a batch with measurements, and I now share with you my current working recipe.  Your consistency will vary depending upon the type of milk you use (if you don't have access to goat milk, you will need to add more cream and less milk for a thick, creamy ice cream), and your ingredient amounts may vary depending on your taste and the quality of your inputs (I recommend purchasing cinnamon and vanilla from Mountain Rose Herbs and I love the Earth Circle Organics raw cacao powder).


[Caveat number one:  I have found that my "DIY at home" ice cream maker doesn't produce ice cream of store-bought consistency.  But I much prefer a natural raw ice cream to the adulterated products offered commercially.  Maybe mine is softer, but it's so much healthier and so delicious...so who cares about stabilizer-filler-induced consistency?  If you can't afford a commercial compression machine, this isn't a bad alternative.  Caveat number two:  If you purchase through product links here, I can earn a small commission.  And I thank you, because that would be a great help to me.]


Mexican Chocolate Ice Cream

In a medium-sized saucepan, gently heat (just under a simmer) until well mixed and slightly thickened:

  • 3 cups raw goat milk
  • 1 cup raw cacao powder
  • 1 1/2 Tb. cinnamon powder
  • 1 tsp. vanilla bean powder
  • 1/2 cup raw honey
  • 1/3 cup coconut sugar
  • 2 eggs (lightly whipped with fork before adding)
  • dash salt

In a separate bowl, whisk together:

  • 2 1/2 cups raw cream
  • 4 pastured egg yolks

Pour cacao custard mixture into cream/yolk mixture, whisk well to combine.  Your custard will be liquid-y, but thicker than milk consistency.  Place custard into refrigerator for a few hours to chill, or place in freezer for a shorter period of time...check to make sure it is chilled quite cold before you make the ice cream.

To make the ice cream, follow your machine's instructions, pouring the appropriate amount of custard into your machine (mine is 6 cups) and running it for the requisite time (about 25 minutes).  You'll need to understand how your machine works to decide when your ice cream is finished, but the consistency will likely be soft like frozen yogurt, or like a really thick milk shake.  When the process is complete, remove the ice cream from the bowl into another container and place in freezer for a little while to firm it up before serving.  If you freeze the ice cream completely, it will become much harder.

Play with the ratios and flavors and Enjoy!

Radically Natural Recipe: Sourdough Brownies


I made sourdough brownies for my eldest son's recent birthday.  To be honest, the consistency was far more cake-y than chewy, thick brownie.  But my kids were ecstatic to partake of the celebratory delight and not a one of them complained about the finished product.  

This recipe was one of the highlights in our continuing saga of post-GAPS "are our guts ready for NT-style grains?"  The jury is still out on our healing quest's end game...more on that in weeks to come.  But for those of you who tolerate and enjoy properly prepared grain goodies, here is a recipe to try.  Just remember me by adding extra cinnamon love!

In the following recipe, I use The Grainery's raw cacao paste, which you can purchase from Azure Standard Co-op.  This paste is similar in texture and taste to unsweetened baking chocolate, but the paste is pure cacao bean/nibs ground into liquid and then solidified at room temperature.  Baking chocolate may be an undesirable choice, depending on the ingredients/source.  Baking chocolates contain soy lecithin, and some contain sugar.  Pure cacao paste is just that.

This recipe is inspired by the Cultures for Health recipe of the same name.  


Sourdough Brownies

4 oz. cacao paste 
1/2 cup hot water
1 tsp baking soda
1/2 cup coconut oil
1/2 cup butter
1 1/2 cups honey
2 eggs
2 tsp vanilla
2 Tb. cinnamon
1 1/2 cups sprouted flour of your choice (preferably low gluten, or ancient grain variety.  I used a mixture of Kamut and Einkorn)
1 tsp salt
1 1/2 cups sourdough starter

  • Melt cacao in double boiler, low to medium heat.  Pour in the hot water, mix.  Stir in baking soda until mixture is foamy.  Set cacao mixture aside to cool (should be warm, not hot).
  • Cream together butter/coconut oil and honey.  Add eggs, mix well.
  • Add vanilla, cinnamon, chocolate mixture.
  • Slowly add flour and salt.
  • Add sourdough starter.  Fold to combine gently.
  • Pour batter into greased 9x13 pan.  Allow batter to rise in a warm spot for 1/2 hour.
  • Bake brownies at 350º for 30 to 40 minutes (test with toothpick for doneness).

Top with raw whipped cream and enjoy!

Radically Natural Recipes: Pit Powder

While it has become common knowledge among women who care that many commercial anti-perspirant/deodorants should be avoided for their inclusion of aluminum, it is less common for women to understand that using commercial anti-perspirants at all is undesirable.  Blocking the sweat glands under the arms contributes to clogging the lymphs located there, which can increase toxic buildup in said glands.  We need to sweat...it is an essential component is detoxification.  To keep your lymphatic system running cleanly, ditch your anti-perspirant and use the natural solution:  coconut oil and "pit powder."

Coconut oil is a wonderful "deodorant," as it is naturally anti-microbial/anti-fungal.  These properties aid in destroying the stench-causing microbes that live on your skin.  Added bonus: coconut oil heals chafing and creates baby-smooth skin.  I use it plain as my facial moisturizer, and as a base in homemade lotions.  Coconut oil is a veritable face and body healing/beauty balm.

I shower in the evening...love to go to bed squeaky clean.  I apply coconut oil liberally after the shower, including under my arms.  In the morning, I apply pit powder.  It's really not necessary, I find, to apply the powder at night before bed.  I also don't need to reapply coconut oil in the morning.  This system works for me.  You can play with it and see what combination works for you.  

(Health FYI: body odor is directly connected to

gut dysbiosis and pathogen load

.  You will notice significant decreases in body odor and bad breath after doing gut healing and anti-candida protocols.  You eliminate toxins through your sweat; this is a necessary and beneficial bodily function.  When you are systemically imbalanced and toxic, your eliminations smell bad.  Learn more from the links below.)

Making your own pit powder is ridiculously simple.  The ingredients help to absorb odors and sweat.  It is not a bullet-proof formula by any means, and it won't stop sweat the way chemical formulations do.  But remember, we need to sweat.  And, whatever you put on your skin gets absorbed into your bloodstream.  So a little less-stinky sweat is better than using chemical cloggers.

To make pit powder

Mix equal parts:

  • Baking soda 
  • Bentonite clay (I like Pascalite)
  • Arrowroot powder 

I make a large batch and store it in a half-gallon mason jar.  I transfer smaller amounts into shaker jars for application.  Into

one cup of pit powder, I add 10 drops of whatever essential oils

suit my fancy.  Stir well and cap.  To use, just sprinkle powder in the palm of your hand and apply as needed.  A little natural moisture does help the powder to "set," so if your pits are bone dry, you might apply a thin layer of coconut oil first.

(This post is shared at

Real Food Wednesday

, check out the great links there!)

Read More

What in Your Bathroom Is Making You Sick?

You Detox Through Your Armpits

Radically Natural Recipe: (GAPS Friendly) Chocolate Mousse Super Snack

For an easy, delicious, nourishing treat, what could be more desirable than chocolate?  If you follow my blog, you undoubtedly have observed my little love affair with raw cacao and pastured butter.  My kids know what a butter pusher I am, LOL, and my middle son tells people that he values butter higher than money.  They echo my mantra, "More butter for everyone!"  And, "Butter builds brains!" Ah, how children make a mother proud!


And I lately find myself competing for the cacao stash, once the sole domain of mama.  But how can I deprive my wee ones (and big one) from the anti-oxidant-, magnesium-rich food that puts us in a good mood?  So chocolate mousse, puddings and "bites" have become a staple in our Real Food nourishing traditions.  And it's all guilt-free pleasure!

Treat yourself and your children to buttery chocolate goodness, and relax in the knowledge that you are building their bodies and feeding into their happiness!

Raw Cacao Cashew Mousse

This quick and easy "throw it together" concoction is similar to my fudge, but the ratios and temperature make it a mousse.  You can make this with any nut butter, but cashew is so creamy and mild that it makes this mousse melt-in-your-mouth amazing.  Be good to your health and spend the money on a high quality cashew butter, preferably raw (preferably sprouted, but that's really hard to find).  I use Artisana Raw Organic Nut Butters.  If you are doing GAPS, make sure you can: A) tolerate cacao (for advanced Full GAPS when regular bowels are being passed daily), and B) tolerate cashews (they are a legume, so could cause GI distress).

Mix by hand or with a hand mixer (for large batches) equal parts:
With proportionally smaller equal parts of (I always eyeball...my general ratio is 1 to 4 herbs/spices to butter/cacao.  Add to your taste!):
And raw organic honey to taste.  Start small and add more to avoid the cloyingly sweet honey flavor overpowering your chocolate.  You shouldn't taste the honey, you should taste chocolate.  (I think my ratio is 1 generous teaspoon honey to 1/4 cup cacao powder).

(Until December 1, enjoy 10% off cacao and vanilla products at LiveSuperfoods.com.    10% off cacao and vanilla category page: Use code CACAOSWEETS)

Avocado Chocolate Mousse

For a nut-free variation, use avocados and make a slightly fruity flavored mousse with an even fluffier texture.

With a hand mixer or in your blender, whip three or four very ripe avocados (not gross and moldy and stringy, but very soft with some brown spots).

Add and whip:
  • 1/2 cup cacao powder
  • 1/4 cup butter
  • 1 teaspoon each of vanilla powder and cinnamon
  • 1/3 cup honey
In either recipe you can substitute high quality coconut oil (raw, virgin, cold-pressed, never chemically extruded...the best you can afford).  It will change the flavor and the texture slightly.  Coconut oil is another excellent nourishing food, which I enjoy and use regularly...it's just not butter.  LOL

Enjoy!

For More Information

Oh, pastured butter...why do I love thee?  Let me count the ways...
The Benefits of Grass-Fed Butter
Why Butter Is Better
Vitamin K2: Grass-Fed Butter's X-Factor
X-Factor of Pastured Dairy
Fat Is Your Friend!!

Life without cacao? No thank you...  Just make it the real thing!
Cacao Nutrients
Properties of Chocolate and Raw Cacao
The Health Miracle of Cacao
Cacao: Amazing Superfood

Why stop here?  Let the nourishing chocolate flow...
Real Food Forager's Raw Cacao Bites
Radically Natural Fruity Fudge
GAPS Chocolate Pudding (we all need more gelatin!)

(If you purchase from links in this post, I may earn a small commission...and I thank you for your support!)


Radically Natural Recipe: Butter Toasted Garlic Chunks

On the heels of big brother sharing his birthday cake recipe, my second son, Quinn, wanted to share with our readers his current favorite kitchen concoction.  Here to tell you more about it is Quinny, 7:

To make this recipe, you will need a whole bulb of garlic.  You will need good salt (we like the pink stuff) and extra butter (the yellow kind).  I used a mezzaluna rocking knife.  If you don't have a mezzaluna, you can just use a regular chopping knife.


  • Peel the garlic thoroughly.
  • Chop all the cloves up into a quarter of an inch pieces.
  • After you've chopped it up, put the garlic in a frying pan that is hot and has one big, heaping spoonful of butter melted in it.  Dump the nicely chopped garlic in the pan.
  • Add a small spoon (like a teaspoon) of sea salt into the pan.
  • Stir really well, but don't flip the garlic out of the pan.
  • After cooking for two minutes, add some squirts of lemon.
  • Stir for three more minutes.
  • Cook until it looks goldeny brown.
  • When it's done, spoon the garlic into a jar.
  • Enjoy!


Radically Natural Recipe: GAPS Vanilla Fig Birthday Cake

The first week of October was my birthday, and my wonderful, number one son created this beautiful and delicious cake as a surprise gift.  It was scrumptious, and not just because my son baked it for me.  Here to share his recipe is my guest blogger, Caleb, 13:

The morning of my mother's birthday, I realized that I had not made a gift, gotten a card, or even baked a cake.  There was an idea!  Baking a cake was right there on the list of things I could do without help.  I got out the KitchenAid mixer, found a recipe, and started to bake.

Caleb's Gaps Vanilla Fig Cake

Preheat oven to 350º F
Melt 1/3 cup of butter.
Add 1/2 cup of raw honey to the melted butter.
Stir the melted honey and Butter well.

In the mixer, Beat 6 eggs.
Add in the honey/butter mixture.
Then add 1/4 tsp of salt and 1 Tbsp of pure vanilla extract.
Mix all ingredients well.

Add 1/2 cup of coconut flour and mix thoroughly.
Gently fold about 1 to 1 1/2 cups of chopped fresh (or dried) figs into the batter.
If the batter is too thin, add a little more coconut flour; it can't be too thin, it can't be too thick.

Pour batter into your muffin tins or cake pans.  (I use silicone muffin and cake pans. If you don't have silicone, I would suggest putting parchment paper in, or greasing with a lot of coconut oil or butter.)

Bake for 20 to 30 minutes or until a knife blade or toothpick comes out clean.

Vanilla Icing
Beat three room-temperature egg whites until foamy, or until soft peaks form.
Boil 1/2 cup of honey until it reaches the hard ball stage.
While beating the egg whites, add the boiling honey.


I really love this recipe.  I encourage you to play around with the spices.  Add some ginger, or cinnamon, or go for a spice cake with all the above and allspice and cloves!  The fun of baking never really ends.  When I was done with the cake, I cleaned up the whole kitchen so that it looked the same as before.  (I even faked some dirty dishes in the sink to make it really authentic!)  My little sister was so eager to eat the cake, she spilled the beans.  Mom was delighted nonetheless.  I love being in the kitchen, and am eager to get other kids cooking real food. 

Original recipe came from the Internal Bliss cookbook.  I added the figs.  Enjoy!


Radically Natural Recipe: Raw Cheesecake with Coconut Cacao Mousse


My family is still healing on the GAPS protocol; we each have different sensitivities, which makes baking quite a challenge.  One child does poorly with coconut, seeds and nuts, another with eggs, another with dairy.  As we have continued the protocol without cheating, however, we find issues steadily resolving.  That's real healing...slow and steady.

My challenge this week was to create a birthday cake for little princess that everyone could eat without too many flare ups.  We are all doing fairly well with small amounts of our raw goats' milk yogurt and raw cacao, so this delicacy was the winner!  (Because of our sensitivities, we do the cheesecake without crust.)

I always joke with my family about how it takes three days to make the cheesecake, but only three minutes for them to devour it.  I adapted the raw cheesecake recipe from Nourishing Traditions; the mousse is my own creation.  I often don't measure when creating in the kitchen, so bear with me.  LOL

Before making the raw cheesecake, you need to make raw cream cheese, which requires that you've previously made raw yogurt.  I make raw yogurt with our goat milk using Culture's for Health Villi yogurt culture. We love our yogurt...it is so mild and creamy.  Once you have yogurt, strain it to make cream cheese. 


I strain my yogurt in a reusable, washable nut milk bag suspended over a bowl.  In the past, I have used a cheesecloth lined strainer sitting on a bowl, and I have also used the hanging flour sack towel method.  I found both of those to be messier than the nut milk bags (particularly the towel method).  You can find the fine mesh nut milk bags on Amazon or ebay and other places online.  They are easy to use, easy to clean.  

To make your cream cheese, just pour your yogurt into the bag, secure the top with a rubber band and hang the bag (by the rubber band) on a cabinet pull.  (If using a towel, place yogurt in middle and gather ends up, securing with a couple rubber bands and hang.)  Place a bowl under the suspended bag.  The whey drips into the bowl and the yogurt becomes cream cheese.  Your straining time will vary depending upon relative humidity in your home; you want all the whey to drip from the cheese.  I find the process takes anywhere from four to eight hours, depending upon how thick or runny my yogurt is.  See photos below.


Empty yogurt into nut milk bag
Secure top of bag with rubber band and hang from cabinet 

Allow whey to drip out completely

Raw Cheesecake (crust-free)

(Adapted from NT's Raw Cheesecake, page 566)

4 cups soft raw cream cheese (see above LOL)

4 pastured eggs, separated
1 cup raw milk
2 Tb. gelatin (I like Jensen's)
1/2 cup raw honey
1 Tb. raw Vanilla Powder
pinch sea salt
dash fresh organic lemon juice 
  • Gently heat milk and egg yolks, stir in gelatin until dissolved, remove mixture from heat.
  • In food processor (or blender), combine cream cheese with honey, vanilla, lemon.
  • Add egg yolk mixture, blend until smooth.  Transfer to bowl, put in fridge.
  • Beat egg whites until stiff (add pinch of salt, it helps firm up the whites), gently fold into cheese mixture.
  • Pour cheesecake filling into ramekins.  Refrigerate for a few hours.
  • Before serving, top with cacao mousse!


Coconut Cacao Mousse

Super easy, super delicious!  I warned you, though, I don't measure here...so I'll give you my best guess measurements based on eyeballing what I do.  Play with it, taste as you go...you can't fail with these ingredients!  When making a large batch, I use a handheld beater; smaller batches, I whisk.

In a bowl, mix together 1/2 cup each:

With 1 heaping tablespoon each:
  • Cinnamon
  • Vanilla Bean Powder
And 1/4 cup raw honey (certainly measure and add honey to taste), plus a dash of sea salt to enhance the chocolate flavor.  Optionally, add a small spoonful of maca root powder, an adaptogenic herb/superfood rich in calcium, magnesium and B vitamins, that helps to balance hormones and increase energy

Keep the mousse at room temperature and top your cheesecake ramekins just before serving.  Enjoy!

This post is part of Kelly's Real Food Wednesday.  Check out the other wonderful treats featured at her carnival.


More about Maca Root and Adaptogenic Herbs


Radically Natural Recipe: Indulgent, Nourishing, Healing (GAPS-friendly) Cacao Bites (aka Chocolates!)

I have the best husband in the world.  I'm sure many of you ladies would say the same (that you have the best husband in the world, not that mine is, LOL), but I need to sing the praises of my man.  I happen to be 13 weeks pregnant.  I suffered a miscarriage in September, but to my shock found myself pregnant again soon after.  I have a history of infertility (my stint with veganism didn't help), miscarriages and rather uncomfortable pregnancies.  So while we are ecstatic about this newest child, we are being cautiously optimistic at this point.  My pregnancy this time is typical of my other successful pregnancies, though, meaning I'm sick, sick, sick (9 month stomach flu, anyone?)...but on the bright side, I'm keeping most of my food down, which is an improvement over past pregnancies (thanks to GAPS).  


Anyway, lllooOOOonnnngGGgg intro here, sorry...the point is that dear hubby asked last week what he could do to help lift my spirits amongst all my tummy misery.  I jokingly told him that if he could find me some raw cacao truffles made only with pure Real Food ingredients of cacao, honey, herbs, spices and salt, he'd be my hero.  Well, he already was, but the man never fails to amaze me.  My sweetie surprised me this week with a box of nothing less than the finest, most delicious, healthy, Real Food raw cacao truffles!

If you are in the mood to splurge, please check out Zorba's raw chocolates and order some nourishing cacao goodness for yourself!  Oregon chocolatier Todd Bjornson is as passionate about the health benefits of raw cacao as he is about crafting delicious, beautiful and nutritious Real Food chocolates.  The coconut and rose truffles are amazing.  I'm sure they are all fabulous, but those are the ones I nibbled and instantly fell in love with!

But if you're like me, and you want to be able to make your own Real Food chocolates, any time of the day or night, I've got a recipe for you.  OK, these are not soft-centered flavor-nuanced truffles, but they are pretty good little chocolate bites (if I do say so myself).  Similar recipes abound on the web, and the following is my version.


Who doesn't like chocolate, right? (OK, I'm sure you're out there, but don't rain on my parade, LOL.)  This simple recipe guarantees guilt-free, healthy, even medicinal chocolate that will delight the palette of any family member.  (If you are in the advanced stages of healing on the full GAPS diet, this recipe should work for you; test a small amount on yourself and see how you respond.)


Full of good fats, nutrient-rich raw cacao, potassium-rich raw honey, gut-friendly cinnamon and the optional healing/nutrient herb or berry powders, these homemade dark chocolates are indulgent and comforting, as well as rich...a little bit goes a long way!  Hubby and I have an affinity for "Mexican chocolate," hence the cinnamon and cayenne.  But, as always, I encourage you to experiment with this recipe and its ratios...make it your own!  

Raw Cacao Bites

[I use a digital scale to measure ounce ingredients]


5 oz. organic cacao butter 

3 oz. raw cacao powder 
2 tsp. organic cinnamon powder
1 tsp. organic vanilla extract (make your own)
2 Tb. + raw honey (add more to taste...I like fairly dark chocolate)

Flavor and nutrient options (add to above):

Coarse mineral rich salt (such as Alaea or pink Himalayan)
pinch (I'm not kidding) of high heat unit organic cayenne powder
1-2 Tb. butter (this adds a creamy carmel taste/texture...melt with cacao butter)

*The addition of an herbal powder will add botanical medicine and increased nutrients to your chocolates.  You can add more than the amount I suggested, but beware that the addition of too much powder will make your chocolates grainy.  Also, some herbal powders are quite bitter, so you may need to add more honey to taste.  I like to use camu camu for its vitamin C content, or bilberry for its vascular healing properties.  The choices are endless.  Check Mountain Rose Herbs or Live Superfoods for herbal powder ideas.  (Live Superfoods also carries raw cacao powder and cacao butter.)


Technique

Gently melt cacao butter over very low heat in double boiler.  Add powders, vanilla and honey, and whisk smooth.  When everything is well incorporated and liquefied, pour into silicone molds (at the bottom of which you have sprinkled a bit of the coarse salt), allow to cool at room temperature or place in refrigerator.  Do not place in freezer, as you will cause undesirable bloom to develop on your chocolates.  

When heating your ingredients, stay under 118º to keep it raw and maintain optimum nutrients (you can check with an instant thermometer).  Why raw cacao?  Well check out its nutrient profile: Raw cacao is high in magnesium, anti-oxidants(!!!), and wonderfully healing hormone enhancers.

Rather than cacao butter, you can use coconut oil, but I've tried both and prefer the cacao butter for taste and texture.  I find that my coconut oil is rich in coconut flavor, sometimes overwhelming the chocolate essence, and coconut oil does melt in your hands faster than cacao butter.  Coconut oil also has a slightly greasier, and less pleasant "toothsome" texture than does cacao butter.  But you can try either fat, or mix them...your preference.  I also don't use carob powder because it is a starchy legume (GAPS illegal), lacks the true flavor of chocolate, and is deficient in those powerful raw cacao anti-oxidants.


Yes, cacao contains theobromine, an alkaloid that has stimulating properties similar to but milder than caffeine.  But theobromine has beneficial effects, such as enhancing circulation, and does not contain the adrenal-draining and addictive properties of caffeine.  In my opinion, moderate amounts of raw cacao are nourishing and medicinally beneficial.  I don't let my kids overdo it, just as I limit their intake of raw honey.  These Real Foods are nutrient-rich, but can be stimulating and should be monitored as a minimal part of the diet.  But we all need a treat, and if we're going to treat ourselves we should do it with delicious, nutritious, body beneficial Real Foods!

[Linked at Kelly's Real Food Wednesday carnival...check out the other great posts!]

Radically Natural Recipe: Coconut Macaroons

I have always loved coconut macaroons...bite-size, chewy, golden balls of vanilla coconut goodness.  In past years, when suffering through bouts of "I'm too sick/exhausted/busy to bake," I would purchase and enjoy Jennie's Macaroons.  The original recipe was simple and healthy.  In recent years, however, I noticed that the company changed its recipe, adding cane sugar in addition to honey.  Because I don't want to feed my children cane sugar (it's not as healthy as honey), and because we have been doing GAPS anyway, I decided to finally conquer the healthy minimal-ingredient macaroon.  After a few disappointing iterations, I think I finally succeeded with a macaroon whose flavor, texture and nutrient profile is pleasing (the trick is using the blender).  I hope you enjoy them as well!


Nourishing (GAPS-friendly) Coconut Macaroons
6 egg whites
1/4 to 1/2 tsp. salt (I like pink himalayan)
1/3+ cup raw honey (may need a smidgen more "to taste" depending on strength of honey and coconut)
1 Tb. vanilla extract (make your own with vanilla beans and vodka...recipe coming soon...so easy!)
3 cups raw organic coconut flakes
  • In blender (food processor might work as well), blend the coconut until it is very fine, even "buttery."  This step alleviates the "crumble apart" texture of the finished cookies.
  • Add honey, vanilla, salt to coconut and blend.
  • Beat (in mixer or by hand) egg whites to stiff peak stage.
  • Fold coconut mixture into egg whites.
  • Place batter by small spoonful sizes (I use a small cookie scoop) onto lined baking sheet (I use a Silpat liner).
  • Bake for 30-40 minutes at 300 degrees...until cookies are golden, or very lightly browned.  I stop at dark gold because I like the chewy texture.  The beginning of light browning will give a crispier outer texture.
Experiment with the amount of coconut blending and the amount of baking time to determine your favorite cookie texture.


Radically Natural Recipe: GAPS Fudge, Take Two (aka Fruity Fudge)

I stumbled upon a raw chocolate fudge cake recipe over at Chocolate Covered Katie's site, and it inspired another session of GAPS fudge making in my kitchen.  My kids call this creation "freezer brownies," I call it fruity fudge pie, but we all call it DeLICiOuS!!


My first attempt involved raspberries from our neighbor's garden.  The fudge was scrumptious, but grainy...I had used the mixer without first blending the berries.  So, for my second (and more successful) iteration, I used strawberries and the blender (alas, all the raspberries found their way into our bellies before concoction number two).  The results were quite pleasing, very smooth and creamy.  You can make it either way depending on your palette's preference for texture.

This recipe will fill one standard pie dish.  You can either blend or mix (by machine or hand) the following ingredients:

1 cup ripe organic berries (or thawed frozen berries with their juices)
3/4 cup raw cacao powder
6 Tb raw grass-fed butter
6 Tb coconut butter -- see Katie's recipe (I used Tropical Traditions Coconut Concentrate)
1/4 tsp. sea salt
1/2 cup raw honey
1 tsp. cinnamon


Spread mixture into pie plate and freeze until quite firm.  Non-GAPS folks could top with whipped raw cream; we will top with whipped coconut milk and extra berries.  Enjoy!


Radically Natural Recipe: Ever Just Have Fudge for Dinner?

Well, it happened. I was tired, hot and grumpy, and I fed my children nothing but fudge for dinner. BUT, before you judge me too harshly, fellow Real Food crunchy mamas, let me assure you that it was healthy, luscious raw butter fudge!


I used to make a similar recipe with coconut oil, but when I obtained access to raw organic grass-fed cream, I switched. Sorry, coconut oil, I love you, but game over! Friends of ours have a grass-fed Guernsey cow, giving me access to a half gallon of gorgeous Guernsey cream once a week. It makes great butter...butter that doesn't last long in this household of butter gobblers. We eat about 1/2 pound of butter daily, with rationing, and the half gallon currently makes about 1 lb. of butter. I can see why once upon a time, everyone had his own cow. Someday, we hope to have a butter cow. Until then, I beg cream off my friends!

[Warning...this fudge is addictive and not necessarily GAPS friendly (there is some debate about raw cacao).  We cheated and paid for it a bit, but I see a future of fudge once our systems are more stabilized.]

Thanks to Sarah, the Healthy Home Economist for the inspiration.  She uses carob and peanut butter, but carob is definitely GAPS illegal and I'm not a fan of the ubiquitous peanut (even organic) primarily because of the aflatoxins (I have other peanut doubts, but that's another story).  Because my son is allergic to tree nuts, we cannot substitute almond or cashew or another nut butter.  I make raw sunflower butter and it worked quite well in the recipe.  To make sunflower (or pumpkin seed) butter, soak the seeds overnight, drain and rinse, allow to dry a bit (half a day or so), then blend with a bit of sea salt and some organic melted coconut oil or organic EV olive oil...but beware your olive oil source, as many olive oils are fake or adulterated.

Nut-Free Raw Butter Cacao Fudge
1 cup raw grass-fed butter softened
1/2 cup raw sunflower butter
1/2 cup raw honey
1/2 cup raw cacao (I like Earth Circle Organics )
1 tsp salt
1 tsp vanilla
1 Tb. cinnamon

Just add everything to a mixing bowl and whip.  I made this fudge directly after making the butter, so it was soft and creamy.  Smooth the mousse-like mixture into a baking pan (I use a Pyrex Square Cake Pan) and place in the freezer.  Once it is hardened, you can cut the fudge.  Store the fudge in the freezer to keep it solid...that is, if you have anything left to store once your kids and husband have a nibble.  This butter fudge melts on your fingertips and in your mouth.  (Eating in a bowl with a spoon is a mess-free alternative; it's like cold, solid mousse.)  It's a nourishing indulgence...a butter (and chocolate) lover's dream.  

Butter Making Resources
Cultured Butter
Video: How to Make Raw Butter


Tomorrow it's grass-fed steaks, soup and salad for dinner.  Sometimes you just need to eat the fudge.  Enjoy!


Radically Natural Recipe: GAPS Moist, Chewy Cacao Cake

The progression through Full GAPS is a unique process depending upon your sensitivities and level of dysbiosis.  My family suffers on different levels and struggles with varying rates of healing.  But we are finally at a place where I can experiment more with baking, and we are able to occasionally enjoy this chewy chocolate treat.

This is what I consider to be a "universal" baking recipe, one that can be called cake, muffin, cupcake, even brownies.  The texture will vary depending on the amount of each ingredient used, so feel free to tweak and experiment to achieve your desired consistency.  Here's the formula we've been enjoying:


GAPS Cacao Cake
8 Tb. butter (I use 1/2 brick of Kerrygold unsalted), melted
1 cup cacao powder (I like Earth Circle Organics raw cacao)
8-10 eggs, depending on size
1 cup honey (I use raw organic honey from Azure Standard Food Co-op)
1 tsp. vanilla (I make my own with Mtn. Rose Herbs vanilla pods and brandy)
1 Tb. cinnamon (optional dashes of other spices as well, such as nutmeg, ginger, cloves...)
3/4 tsp. sea salt
3/4 cup coconut flour (I like Tropical Traditions)

Melt the butter in a small saucepan, whisk in the cacao powder and cinnamon.  Separately, whisk the eggs (I use a KitchenAid standing mixer for this recipe, but you can whisk by hand as well).  I have found that the cake is "fluffier" if you spend time whisking the eggs individually.  Add the honey, vanilla and salt, mixing well.

Add the coconut flour slowly, mixing well to avoid lumps.  Add the cacao/butter mixture and whisk thoroughly.  Pour the batter into a prepared pan (coconut-oil-greased glass or silicone) and bake for 20 to 30 minutes at 350 degrees, testing with a toothpick or butter knife.

This recipe can be used in a square or rectangular cake pan, or in muffin pan.  I love the HIC Silicone Mini Muffin Pan ...that brand actually uses pure, food-grade silicone.  [You can can tell if your silicone has plastic fillers by doing a pinch test.  Just squeeze together an inch of the silicone and see if it turns white...if so, you have fillers and I would advise against using that pan for baking.]


This recipe was inspired by one I found at The Well Fed Homestead.  Hers is different but just as delicious, so check it out as well (Fudgy Coconut Flour Brownies).  I must credit my eldest son for our latest iteration of this cake recipe; he is becoming a fantastic chef and is developing excellent kitchen instincts!

[A little culinary/food snob trivia:  You may notice the different spellings of cocoa and cacao.  The common vernacular is cocoa, as in processed cocoa powder, but the more authentic term is cacao, as in cacao pod/bean/tree or raw cacao powder, and it is pronounced cuh-cow.  Chocolate and cocoa are derived from the cacao tree.]

Another great coconut chocolate cake recipe can be found at the Tropical Traditions web site, for those of you not doing GAPS.  The video below is a good step-by-step guide; note the emphasis on beating the eggs separately.


Celebrating One Year on GAPS...Recipes and My Favorite Things

It's the end of May (wow, how did that even happen?), which brings our family to the one-year anniversary of our GAPS protocol.  From thinking that Intro would literally kill me (initial die off was severe), to having children complain 101 times about "soup AGAIN?!," we persevered, learned some tricks, and actually came to like many of our new GAPS meals.  Thus, we celebrate the end of Year One, hopefully the halfway point for our GAPS journey.  In honor of this momentous occasion, I wanted to share with you some recipes and a list of a few of my "favorite things."  [Cue Julie Andrews swirling in a lush high-mountain Alps meadow, swelling music, and.....la da da da dee dum.....ooh, look...grass-fed raw butter...run, children, run to the butter!  ahem...er...  Have I mentioned how much I adore butter?]


I think the recipes, foods and tools about to make their appearance here would appeal to anyone, GAPS or no GAPS.  In fact, only the baked goods are specific to my life with GAPS.  Actually, the recipes I'm planning to share are inhabitants of my favorites list, so let's just go directly to the list.  In no particular order, of course...


Buttered Dates
My toddler and her date
Yes, I lead with the ultimate GAPS indulgence.  At least, MY ultimate GAPS indulgence.  I know I've mentioned these goodies before, but the pleasure bears repeating.  In my life pre-GAPS, sea-salt-sprinkled dark chocolate-covered caramels were my ultimate guilty little pleasure.  Hubby would surprise me with a small box from various cities on his business travel schedule, and I would happily hoard and hide the precious loot.  Did I mention it was a guilty pleasure?  My post-baby waistline most certainly groaned about my favorite decadence.  Fast-forward to life on GAPS, post-Intro.  When I finally felt ready to introduce fruits, I yearned for medjool dates.  Perhaps this craving was instinctual, as many cravings can be, for my body desperately needs magnesium.  Because I find the sugars in dried fruit to be rather potent for my system, I began buttering the dates to increase nutrient absorption and buffer the sugar "high."  It worked, and a favorite evening treat was born.  I find medjool dates slathered with salted Kerrygold butter to impart a flavor so reminiscent of creamy caramels that I no longer feel deprived of my one-time obsession.


Coconut Flour Butter Cookies
Following the sweet trend I've begun, I wanted to share the recipe my eldest son and I concocted.  These cookies are a rare delicacy for us because my middle child is still sensitive to coconut.  We cannot use any of the other nut flours common to the GAPS protocol because of his severe (but improving) reaction to nuts.  I can get away with infrequent uses of coconut flour and cream without causing too bad a flareup for the little guy.  After a few iterations of these cookies, this final version became the family favorite.


Ingredients:
1/2 cup butter (we're using Kerrygold most often for baking)
5 to 6 eggs (preferably pastured)
1/3 cup granulated coconut sugar (or 1/4 + cup honey)
Dash each ginger, cloves, nutmeg
1 tsp. cinnamon
1/2 cup + coconut flour
Fruit-only jam (like St. Dalfour All Natural Fruit Spread or Bionaturae Organic Fruit Spread)


Cream the butter and sugar, then add the eggs and beat on low speed until well incorporated.  Add the spices, then add the flour, mixing on low speed.  Depending upon the water content of your eggs and butter, your relative humidity and the phases of the moon (LOL), you may need to add more coconut flour to achieve a batter consistency.  This batter should not be runny...it should be thick, but not stiff like you're making play-doh; spoonable thick.  Add extra coconut flour slowly, incrementally, until all ingredients are well blended and consistency looks good.  Spoon globs of batter onto parchment or Silpat-lined cookie trays; you can flatten the cookies a bit with your finger.  Optional:  Indent the top of each cookie and add a dollop of jam into the depression.  (We make them both ways, but love the jam dots.)  Bake at 375 for 12ish minutes; the cookies should be golden brown and firm to the touch.


Raw Goat's Milk Yogurt
We currently have one milking doe in production, so our supply of browse/grass-fed raw goat milk is a precious commodity.  We get 1 quart daily, which awaits its twin from the next day and then becomes yogurt.  I use the countertop Villi starter from Cultures for Health and I always make the yogurt raw (excepting the pure starter, as per the instructions).  I know my picture reveals a food-fermenting no-no (as my yogurt cultures in the window), but in our still-chilly, winter-like house, that space above the baseboard heater is the warmest spot I have; it provides the most successful culture.  I hope to find a darker warm location as the heat increases.


Culturing the yogurt in our warmest location
Now, I exaggerate not...this yogurt is the creamiest, sweetest, tastiest yogurt I have ever eaten...it beats cow's milk yogurt any day.  Sure, I'm partial to the health advantages of goat's milk for human consumption (more easily digestible, more suitable to our human makeup), but I kid you not (see, I managed to fit in a pun), this raw goat's milk yogurt is dreamy.  One caveat...I am having trouble keeping my starter alive this spring.  We live in a very moist pacific northwest environ and I believe the natural molds in the air are competing with the flora in my culture.  The yogurt has been on the runny side.  But, this too shall pass.  Having this traditionally fermented pro-biotic food for our diet has been a culinary and gut health boon.


Savory Roaster
I credit my latest cooking tool find to my mother-in-law, who pulled out her mom's antique roaster during our visit last month.  The enameled (steel? iron? aluminum?  I honestly don't know) large oval roaster will hold a small turkey or a couple nice sized roasts.  I have used mine to cook pork and beef roasts to perfection.  The supposed secret to the Savory Roaster's success is the rounded bottom and well-fitting lid.  These roasters are out of production, but I found a great-condition roaster on ebay.  There is a Savory Jr. Roaster that is about half the size of the Daddy roaster, but they are far harder to find and much more costly.  Now don't get me wrong, I still love my crock pot...it saves me so much time and makes sure my kids get fed when I've forgotten to plan the next day's meals.  But a savory roast, well, it puts me in mind of an Old Testament story in the Bible of Isaac on his death bed requesting his favorite meal..."And make me savory meat, such as I love..."  I couldn't agree more...I love my savory meat.


Beef Roast Recipe
I grab a roast or two from the freezer (from our sumptuous Hat Creek dry-aged, grass-fed beef stash), pop it in the roaster, add a cup of stock (from whatever I have made), add a few chopped onions, some bruised garlic cloves, a few roughly chopped carrots, a couple bay leaves, a generous dousing of sea salt, a sprinkling of thyme, basil, marjoram (whatever suits my fancy that day), place it in a 400 degree oven for a couple hours (testing for doneness when prompted by smell...no worries, the longer it cooks, the more tender it becomes), and voila!  Yummy roast meat.


Nakiri-Bocho
Nakiri-bocho handcrafted from Hitachi White steel
This is my newest favorite toy...the latest addition to my knife collection.  I love many culinary tools, but my knives are by far the most essential tools in my kitchen.  And I refuse to use inferior tools that don't get the job done, so I keep my knives scary sharp.  My husband learned years ago how to sharpen my blades (and his own hand carving woodworking tools) on Japanese waterstones.  His technique has improved dramatically since studying the work (DVDs and in person) of Murray Carter, a Japanese-trained master bladesmith who resides in Oregon.  Dear hubby gifted me with one of Carter's Japanese kitchen knives, the Nakiri-bocho vegetable knife.  The blade on this knife is amazing...very thin and Super Scary Sharp.  It cuts through vegetables like melted butter.  The cut is so smooth and clean, you can even taste the difference.  The vegetable slices are even healthier...truly...the less cellular damage you do when you cut your food, the less oxidation occurs.  That's one reason Japanese sushi chefs (some of my heroes) cut their delicacies so carefully and with such sharp blades.


Herbed Scrambled Eggs with Butter
The locally handmade pottery
makes the eggs even more delicous!
Barred Rocks roaming
Thanks to the coming of spring and the ladies who lay, we are finally getting about a dozen of our own beyond organic, pastured eggs daily (though the pasture is sorely lacking up here...that's another story). Eggs are a staple here, as in most GAPS households, and we love ours in all their forms.  A favorite breakfast is herby scrambled eggs, which we make by mixing a dozen eggs with a small amount of stock (again, from whatever is on hand), sea salt, pepper, and various herbs (basil, chives, garlic, parsley, etc).  After scrambling in generous amounts of pastured lard, we serve the eggs with butter.  Ah, healing, delicious fats, how I love thee!


Spring brings us a Rainbow
You guessed it!
Whew, I see I've created quite a page here...I imagine I should call it quits for now.  I neglected to mention our fabulous nourishing, detoxifying juice and the machine that makes it, as well as my GAPS birthday cake and the scrumptious GAPS mashed "potatoes."  Ah, well...another post for another day!  Until next time, enjoy your spring and savour some of my favorite mostly still-forbidden food for me...I'll live vicariously.


Radically Natural Recipe: Super Snack...Grain-Free Popcorn!

OK, It's not really popcorn without the corn, but we think it's pretty close.  I'm talking about crispy kale.  It's a fantastic snack and easy to make.  We had an abundance of kale in our summer garden and have been enjoying weekly bowls of crispy kale.


For those of us doing GAPS or living grain-free, or allergic to corn, or just avoiding corn (because, frankly, it is getting to be scary stuff), this is a great snack alternative that has crunch and flavor reminiscent to popcorn (my kids think it's better and I agree).
To make crispy kale:
  • Take fresh, clean kale leaves and rip them into bits (leaving behind the stalk)
  • Scatter torn leaf bits in one layer on a baking sheet
  • Drizzle with olive oil, sprinkle with salt and pepper (you can mix the kale bits in a bowl with olive oil and salt/pepper before laying on baking sheet if you want all chips to be well saturated)
  • Bake in oven at 350 for 30 minutes (ish...depending on your oven and the water content in your kale, the crispy kale may be finished sooner, so be aware and check it occasionally)
  • When finished, the kale with be muted green/brown (not burned) and very crispy, crumbly (sorry no pic of the finished product...I turned around to get the camera, and the kale chips were gone! LOL)
Kale freshly harvested from our garden


Torn to bits...


Voila!  Not complicated, eh?  Once you get the hankering for crispy kale, you will undoubtedly want to bake multiple trays...one sheet of this super snack does not last long!

Why kale?
Kale has a good reputation for being high in calcium.  (I like to call it "cow replacer" for people who cannot access raw, organic, free-range, grass-fed milk, or for those who choose not to drink milk.)  But as a member of that glorious cruciferous family of antioxidant-rich veggies, kale also provides some powerhouse anti-cancer properties (primarily from the vegetable's isothiocyanates...derived from cruciferous sulfur-containing compounds).

Kale contains nearly 50 flavonoids, including anti-inflammatory quercitin.  Other nutrients include:

  • Vitamin K (an important partner to vitamin D and calcium in bone building; cardiovascularly protective)
  • Vitamin A and C
  • Manganese, Copper, Tryptophan
  • Fiber, Protein
  • Calcium, Potassium, Magnesium, Iron, Folate
  • Vitamins B1, B2, B3, B6 and Vitamin E
Kale is hard on the digestive system if consumed raw, which is not generally advised.  But juicing, steaming and baking unlock kale's nutrients, so give those methods a try!


[Read more about the health benefits of kale.]

Why not corn?
One word:  GMO.  OK, that's not a word...but you get the point.  Hmmm...this is neither the time, nor the place for a RadicallyNatural look at the dangers (physical/mental health and agricultural impacts) of genetically modified corn.  Suffice it to say that I am concerned with the possibility that it may be increasingly impossible to find untainted, "good old-fashioned" corn.

Because of our monoculture industrial agriculture model, non-GMO, organic, heirloom corn availability is seriously waning.  To make matters worse, GMO corn pollen taints non-GMO crops.  Corn has become a sticky wicket.  You should never, never, never...did I say never ever?...eat genetically modified corn (or any GMOs for that matter).  In addition to the cancer risks and other long-term health risks associated with GM crops, some strains of GM corn have been developed as a human contraceptive.  I am not kidding...sterilizing corn...non-fertility corn.  It should come as no surprise that population-control/technology magnate Bill Gates is part of the project.  Truth is stranger than fiction, don't ever forget it.  GMOs are not foods, they are weapons.

But this is a discourse for another time, perhaps.  If you want to discover some sobering and vexing facts about the food politic madness that is GMO corn, please read the linked articles in the graf above and check out the links/books following.

Links
GM Corn affects fertility
Health Risks of GM corn
Seeds of Deception List of Risks

Books
The World According to Monsanto: Pollution, Corruption, and the Control of the World's Food Supply
Seeds of Deception
Genetic Roulette: The Documented Health Risks of Genetically Engineered Foods

EWWHerbals                                                                              "Every wise woman builds her house..."  Proverbs 14:1

If you make purchases through any affiliate sales links on my site, I will earn a small commission; thank you for your support of my work!